Today was week 1 of our Maple Magic series. For two weeks we will be learning about maple syrup, how to identify maple trees in winter, how to measure trees and tap them for syrup and about the maple sugaring process. Our focus today was on how to identify maple trees in winter and measure the circumference. Also, since the weather was below freezing this week we also got to build a campfire at the barn to warm up! To learn more about the maple sugaring process it is important to learn how to identify maple trees first. When maple trees have their leaves they’re easy to distinguish and a variety of maple species can be tapped for sap to make syrup. But if you plan to go out in winter to try to find a maple tree it can be a bit harder, here is a link to a site that explains opposite branching in maple trees and other species with opposite branches (and much more about trees):

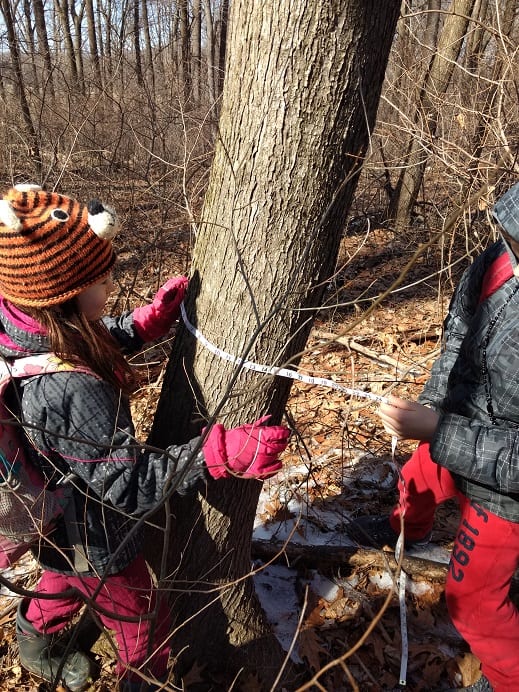
Conveniently, in the outdoor classroom we have a large red maple to examine. We first compared a branch sprig up close showing the opposite branching and compared it to a tree (likely a hickory) that shows alternate branching. We were just hoping to notice the difference, not identify the alternate branching tree. We then took our tape measures out to practice measuring the circumference of a stump nearby. Why do we care how big maple trees (or whatever species we’re tapping for syrup) are before we put a tap in them and hang a bucket on the side to catch sap? Well, these trees need to be a certain size in order to support a tap and a bucket. The general rule is a tree needs to be 12 inches in diameter (or ~38 inches in circumference) to support one tap. A tree that is 21 – 27 inches in diameter (or ~66-85 inches in circumference) can support two taps and a tree more than 27 inches in diameter can support three taps. This also gave us the opportunity for a quick math lesson! We learned what the diameter and circumference of a circle is and we also used a very quick and easy (although pi will take more time to explain) math formula to calculate the circumference from the diameter. Circumference = diameter x pi (3.14).
After finding our circumferences, we practiced measuring the stump and reviewed how to read the tape measure and then measured the large red maple in the Outdoor Classroom and found it’s circumference to be larger than 85 inches so it could support three taps and we even found old scars where taps had been in the past! Other trees besides red maple that can be tapped can be found in the following article:
With some tree tapping knowledge under out belts, we headed out onto the trail to find two trees that fit the other circumference requirements for 1 tap and 2 taps. We did a brief stop at the gazebo for a legend on maple syrup from the Mohawk Native Americans. You can find the story here:
http://www.mbq-tmt.org/assets/Wellbeing/FamHealthChildDev/OriginsofMapleSyrup-Sugar.pdf

After finding them we headed down the hill past the Ed Hut and straight to the barn. Here we explored some of the maple sugaring tools at the sugar shack after answering some simple clues that led us to various props around the barn. We examined the evaporator and learned how it is used to boil sap to make maple syrup and a fire is built down below. We learned that it takes 40 gallons of tree sap to make only 1 gallon of maple syrup. Next we learned about an animal that drills for sap in these trees called a red-breasted sapsucker and thought about the differences between how native people made maple syrup and how settlers made maple syrup. Native people would make it by use boiling hot stones and placing the stones in large logs with a divet cut out. They continued to add the rocks until the water boiled away leaving syrup behind. This syrup they could then eat or place in snow to make a yummy candy. Settlers cooked the sap over the campfire using cast iron pots and then eventually the more conventional method started to evolve using evaporators.
There are a lot of resources online about the maple sugaring process, here is an example:
http://www.ctmaple.org/how-do-you-make-maple-syrup.html
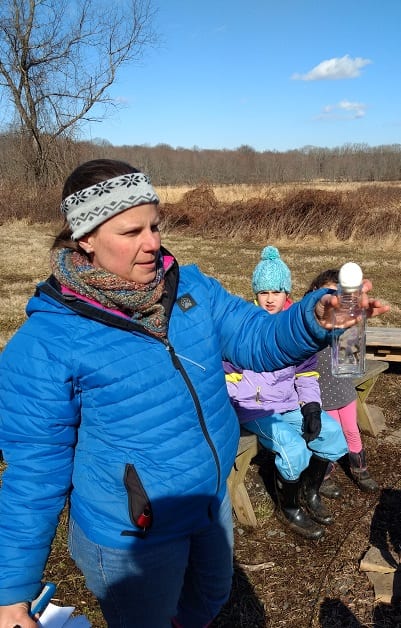

Before starting our own campfire we enjoyed a cool experiment with Mrs. Avril’s class. In this experiment you light a match and place it in a glass jar with some paper that will burn quickly. You then place a peeled, hard boiled egg on top of the jar (the jar needs to have an opening small enough that the egg won’t fall in). With the match lit in the jar and the egg sitting on top, eventually the fire will use all the oxygen from the jar, creating a negative pressure. This pressure needs to be filled so air from outside the jar pushes down and the egg gets sucked into the jar!
Next we started our own campfire in the fire pit, going over the ingredients for a fire, which include dry burning materials: including kindling and larger pieces of seasoned chopped wood, newspaper, dryer lint, milkweed fluff and so on. You also need oxygen and a spark. We also reviewed fire safety while around the campfire.
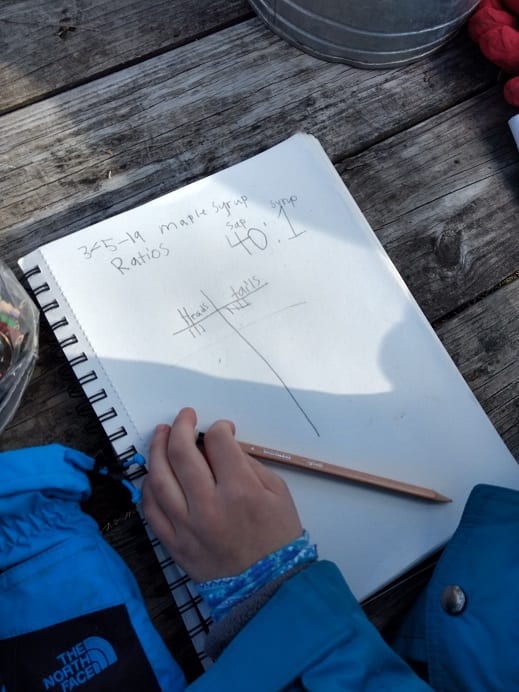
To finish off the day we did a quick but fun math experiment using coins. We paired up and each pair got a quarter. The task was to flip the quarter 10 times total and mark how many times you got either heads or tails. After we finished flipping the coins we learned about how to write a ratio. For example: one group got 6 heads and 4 tails. We would right our ratio of heads to tails like this 6:4. How does this relate to maple syrup? Well, we usually say that there is a ratio of sap to syrup of 40:1, 40 gallons of sap to 1 gallon of syrup. You can also turn these into a ratio and then into a percent if you want to practice at home. For example, we flipped the coin 10 times so you would write the ratio out this way: 6/10 and 4/10. You then can divide 6 by 10 and 4 by 10 to get the following percents, 60% and 40%. You can do the same for the maple sugaring ratio: 40/41 (since you are talking about a total of 41 gallons, 1 being the syrup) which is 97.5% sap and 1/41 which is 2.5% syrup. So only 2.5% of the sap that is collected will turn into syrup!
Next week we will be continuing our maple magic adventure!
