The Art of Falconry
*The following views expressed are my own personal views and experiences. Each falconer has their own views and opinions when it comes to the sport. Each non-falconer also has the right to their own views and opinions. This is where I stand.*
Falconry, in its most basic definition, is hunting with a trained bird of prey. But I’m here to tell you that it’s so much more than that. Here is my journey.
Back in July of this year I began my journey of becoming a falconer. I have always loved all animals, but I never had the chance to work with raptors until about three years ago. That’s when my passion for feathered creatures really began. After graduating from college, I ended up working seasonally for two years at Soldier’s Delight NEA. That is where I learned to work with over 17 birds of prey; everything from Hawks to Owls to Vultures to Crows and Ravens. During my time at Soldiers I was able to attend a falconry training/demonstration at Rocky Gap State Park with Master Falconer, Mike Dupuy. While he’s had his own ups and downs in his falconry career, the information I learned at that training helped me to better the care of the raptors at Soldiers. Also, it was awe-inspiring to watch his Gyrfalcon in action…watching Apollo soar out over the Lake and return to Mike’s glove made me want to have that bond with my own bird of prey. Unfortunately, Mike resides in Pennsylvania, and even though I am right on the Mason Dixon line, you have to live in the same state as your sponsor. I decided that when I eventually moved to PA, I would ask Mike to be my sponsor. In October of 2016 life granted me the opportunity for a full time job here at Irvine Nature Center as the Animal Care and Exhibits Coordinator. While I had more reptiles and amphibians to work with (which I love dearly) the number of raptors dropped from 17 down to 5. (Less in number, but definitely not less in heart!) Nonetheless, the information I learned at Soldiers was invaluable when training the hawks and owls at Irvine. The success I felt when I was able to train our birds to perch to glove for food was amazing!
By stroke of pure luck (and the fact that it really is a small world out there), I met Brian, who would become my sponsor, through a high school friend. My friend, who now volunteers at Irvine, works at our local grocery store. One day I get a call from a random number in the middle of leading summer camp. When I got around to listening to the voicemail I knew a great opportunity had presented itself! The voicemail went something like this: ‘Hi, my name is Brian and I am a licensed and practicing falconer who lives in Manchester, MD. I have a Red Tailed Hawk who is non-releasable and needs a home. I got your number from your friend at the grocery store and he said that Irvine might be able to take the hawk? Let me know!’ Well, long story short(er), we didn’t have the room here for another Red Tail at the moment, but I got a sponsor out of the deal!
First Step, and the hardest step: Finding a Sponsor. Check. Never would I have known that there was a falconer who lived in the town over from me, a 10 minute drive, without my friend’s enthusiasm for the raptors at Irvine. (Thanks, Ryan!). In order to become a falconer, you have to have a sponsor for the first two years while you are an apprentice. Your sponsor must live in the same state as you and agree to take you on as an apprentice, which is no small task! He/She is responsible for making sure you understand the rules, regulations, and ethics of the sport. His own falconry license is on the line if you mess up. Not to say that you’re not allowed to make mistakes, but there’s always that risk for your sponsor. During the two years with your sponsor, he will help you prepare for the exam, assist with the creation of your mew (where your bird stays), trap your bird, and be there for moral support and any questions you may have. Your sponsor will become a lifelong friend.
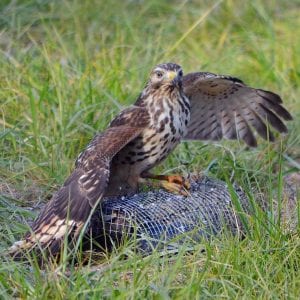
-
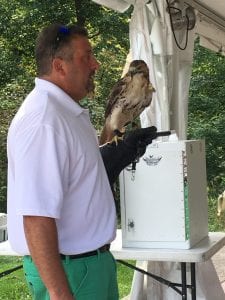
- My sponsor, Brian, and the Red-Tail he tried to place here.
Second Step: Pass the Exam. Check. I studied for the Falconry Exam for close to three months. And that’s even with all of my previous raptor experience. They test is not to be taken lightly. There are 100 multiple choice questions and you must pass with an 80%. On the test is everything from basic raptor identification, care, health, rules, regs, training, etc. DNR wants to make sure that you know what you are getting into with a protected bird of prey that is capable of some wicked things with those talons. They also want to make sure you understand the ethics and severity of the consequences that could happen if you don’t follow the laws. Falconry has three stages. First is the apprentice stage which consist of two years. During this time you are allowed only one bird and it must be a wild caught passage (juvenile) Red Tailed Hawk, Red Shouldered Hawk, or Kestrel. After two years you can apply to be a General falconer. During these five years you are allowed to keep three birds at a time. Both wild-caught birds (of the appropriate species) and captive-bred birds may be possessed. You are not allowed to posses Eagles as a General. After three years of being a General, you may become a young falconer’s sponsor. After your five years you can apply to be a Master falconer. Masters are allowed to posses up to 5 wild-caught birds (of the appropriate species) and an unlimited amount of captive-bred birds. You are also allowed to posses Eagles except Bald Eagles with the appropriate permitting. A Master may also try their hand at raising an eyass (nestling). Other falconry laws can be found by reading the falconry section in the COMAR (http://www.dsd.state.md.us/comar/comarhtml/08/08.03.09.07.htm). Just breathe, if you’ve studied well, you’ll pass with flying colors!
Third Step: Build your Mews and Pass Inspection. Check. Besides finding a sponsor, this is probably the next hardest step. Building a mew for your bird could be done in a week, or in my case, close to three months. There are many legal ways to build a mew. How you choose to build yours is up to how much space you have, what kind of bird you want, whether you are going to tether or free-loft the bird, among many other factors. Three months, 8 friends and family members help, and a hole in my wallet later, I had a mew! Next was the daunting step of getting DNR out to the house to inspect! Pulling up in a huge truck, a fully dressed, armed, Natural Resources Police Officer arrived to look over my mew and ask a few questions. A short 10 minutes later, she let me know that she would recommend me for my permit. Hooray!
-
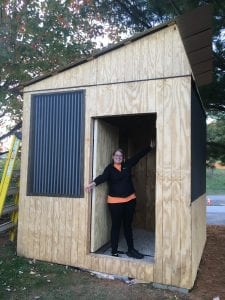
- My mew!
Fourth Step: WAIT. Check. Literally just wait…for days…for a week…then call. And keep calling until you get your permit in the mail! This part sucks. You are completely ready for a bird, but you can’t do anything until that little sheet of paper comes in the mail. Once you have it, the fun stuff begins!
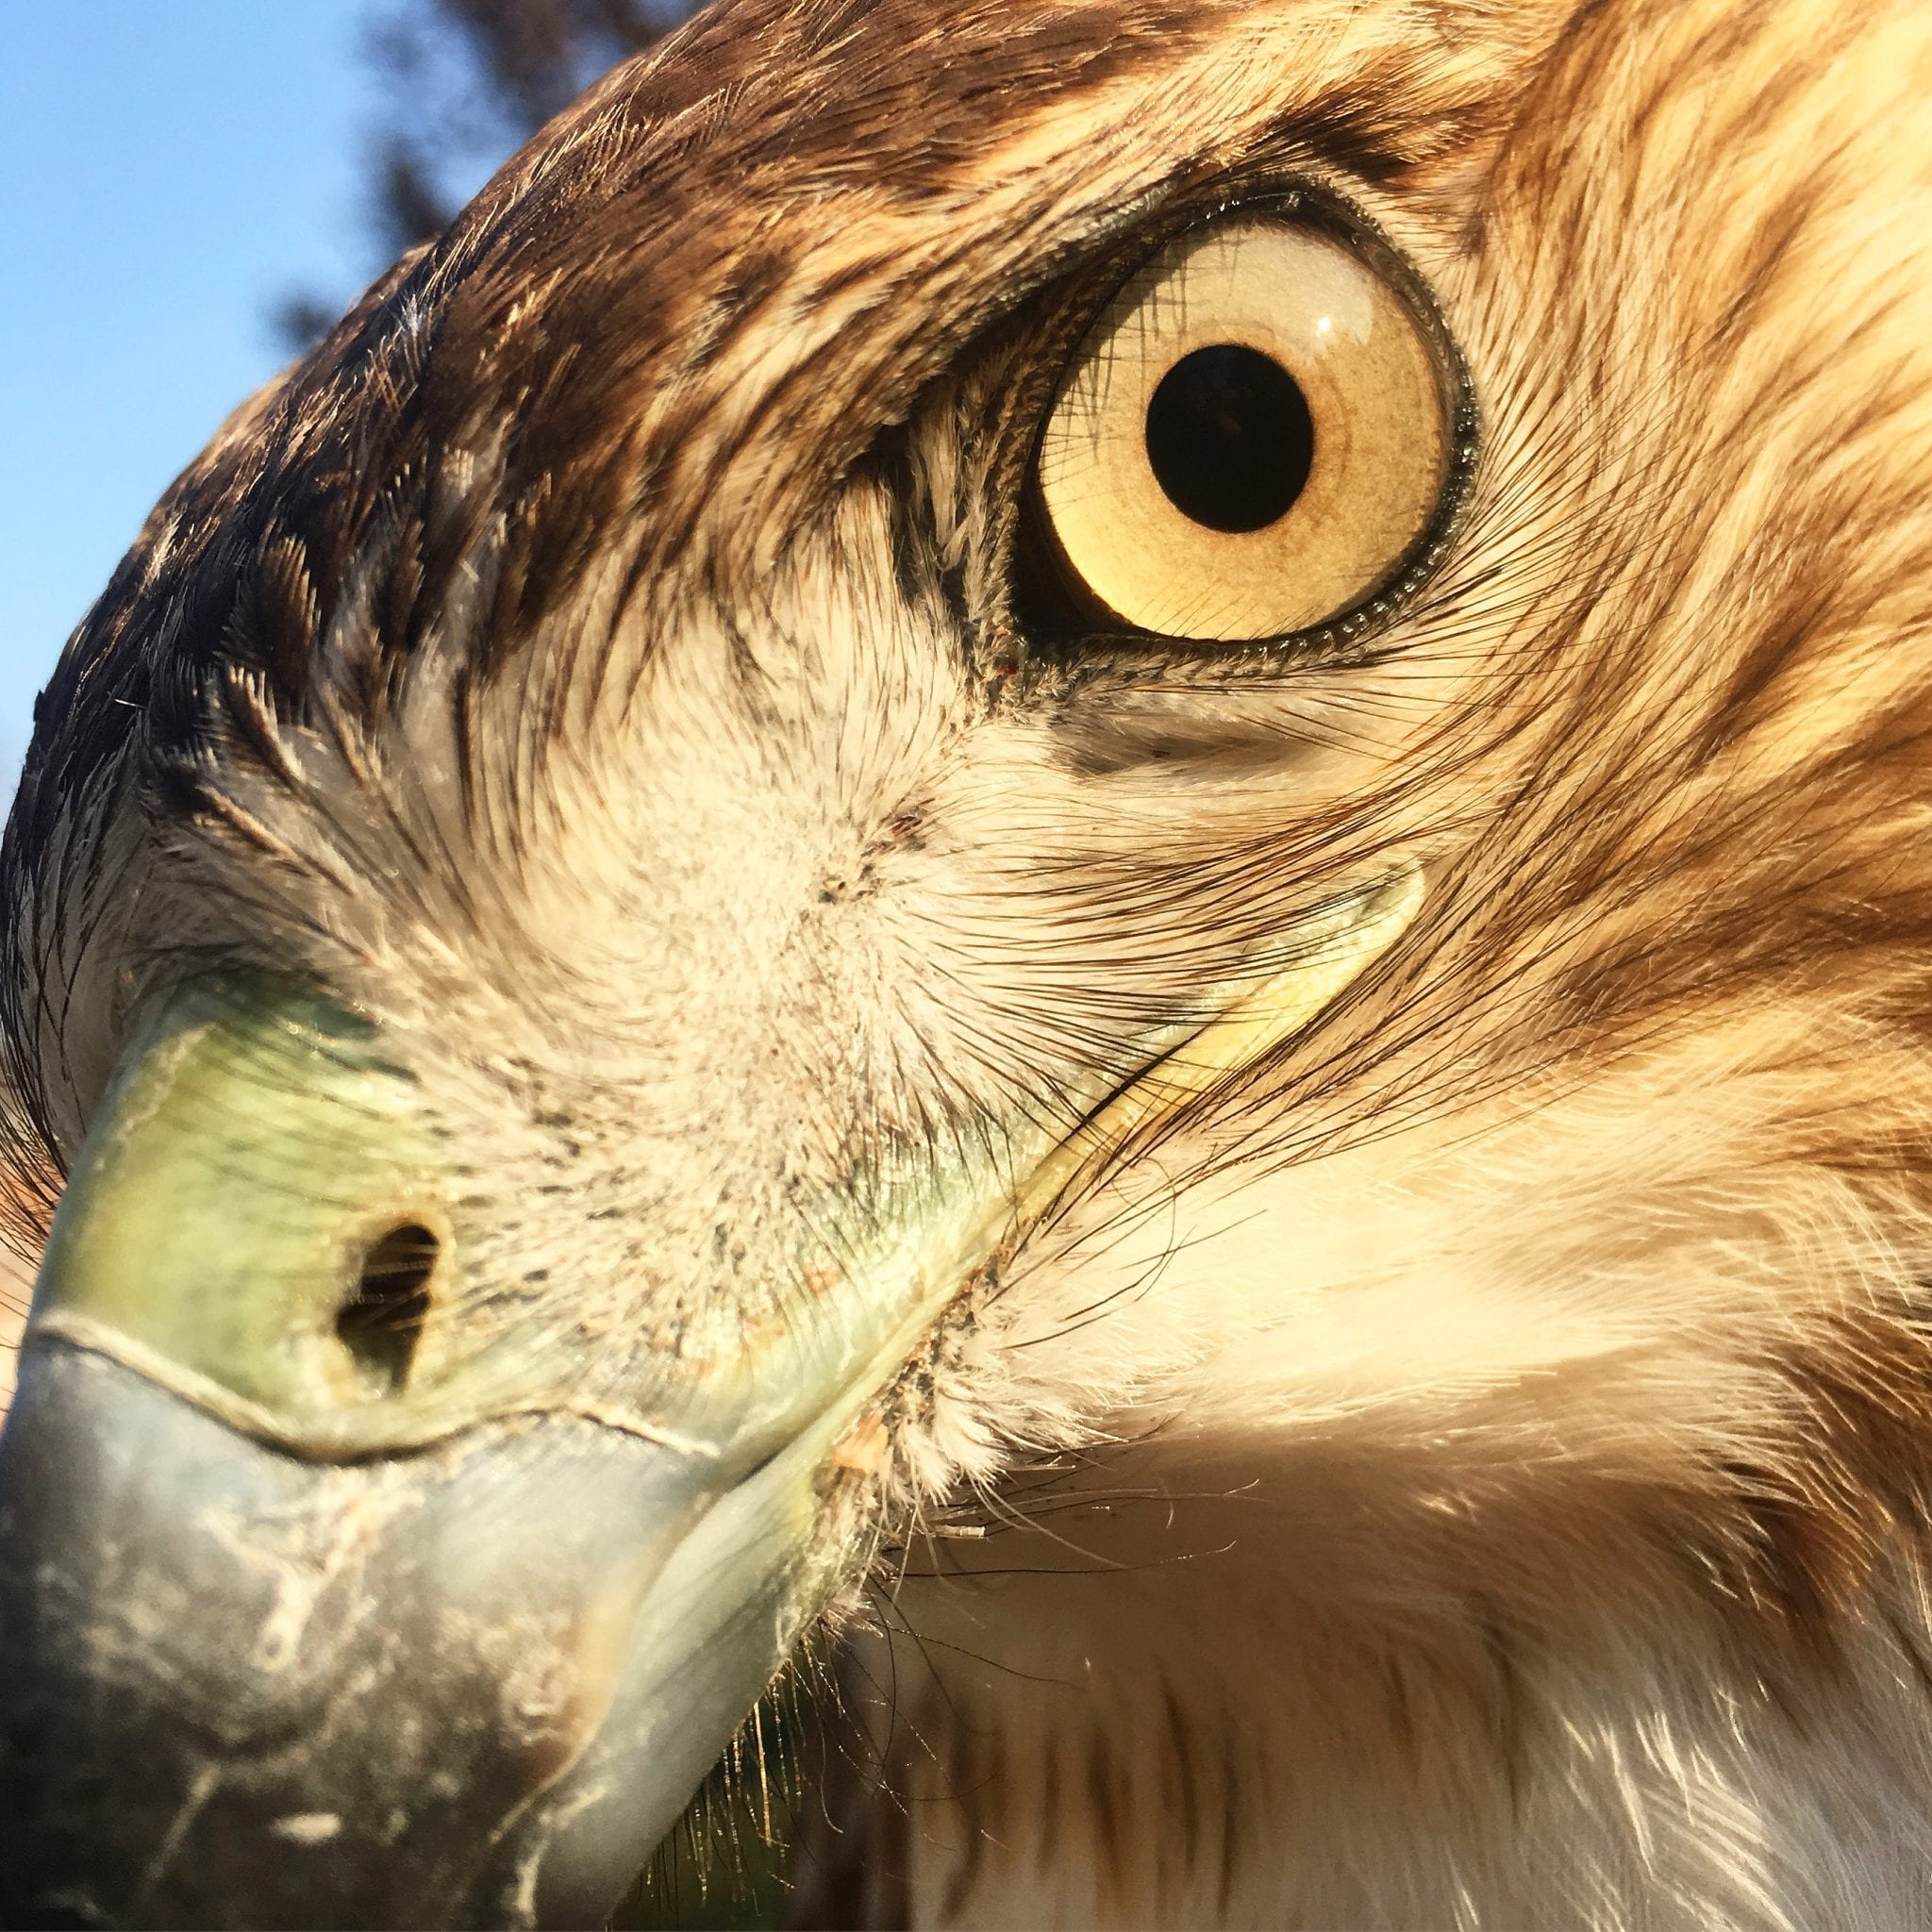
Fifth Step: Trap Your Bird. Check. While this step can also take a long time, the process in of itself is a blast! After much debate between a Red Tail and a Kestrel, my heart won out with the Red Tail. Why? I don’t know. I’ve worked with all three of the allowed species of apprentice birds, but I’ve always gravitated towards the Red Tails. So how do you trap a bird? Wait…trap a bird? It’s a wild bird? You are taking a bird from the wild?! Okay, let me explain. Falconry and falconers take conservation to heart. Same way that ethical hunters do as well. You are only allowed to take a passage bird from the wild. A passage bird is a juvenile bird that is on its first winter. For Red-Tails, this means they don’t have their red tail feathers in yet! The statistics are terrifying…close to 90% of juvenile birds of prey do not survive their first winter. In a different perspective, if a pair of raptors laid three eggs and all of them hatched, only one would make it through the first year. As a falconer, you are trapping one of the other two that would have perished. You aren’t taking a bird from the wild, you are letting another bird live. You are teaching that youngster how to successfully hunt, you are protecting her from predators, from competition, from severe weather. You are allowing that bird to SURVIVE. Many falconers end up releasing their falconry bird in the spring anyways! They get it through the first hard year, hunt with it, and then wish it luck, knowing that they allowed that bird to survive and go on to propagate. Some falconers though, myself included, fall hard for their bird – it will become their lifetime falconry bird. But you know what, that’s okay. It’s a personal choice that a falconer has to make when the time comes. The bird doesn’t need the falconer – the falconer “needs” the bird. The bond you build with the bird is what makes that free spirit return to your glove at the end of the day. If you still have a hard time with this, then maybe falconry isn’t for you. And that’s okay as well. For those that see it in a positive light, trapping is very rewarding and here’s how you do it… The trap in question is called a bal-chatri trap. It is a wire cage that you put live bait in. The bait does not get injured! It is protected from the birds talons inside the wire cage. There are little nooses that stick up from the trap and when the raptor flies in to grab the bait, it’s toes get stuck in the nooses. When I went trapping with Brian and fellow falconer, Tommy, we would use one of my quail that I raised or Tommy’s pet hamster. (That hamster has caught over 5 hawks in her lifetime! She’s a champ!). Driving – driving around for hours a day whenever time would allow…save your gas money for this! Driving and looking for passage birds! Driving back roads, driving the highways, even jumping onto freeways. Driving and looking for passage birds – there’s one? Maybe. Can’t see it’s tail. Is it safe to set the trap out? Safe for us? Safe for the bird? Yes! Throw the trap out of the window! Hurry. Turn around. Wait. Wait for two minutes. Wait for 30 minutes. Depends how hungry the bird is! Wait. After a certain period of waiting, you may get a better look at the bird in questions tail. If you see red, grab the trap, you can’t have her! If you can’t tell, but she’s got her foot tucked up under her, she’s probably an adult and knows better! Grab the trap. If she hits it…wait. Make sure she’s stuck! She’s definitely stuck…drive! Pull-over. Park. Jump out of the truck. Take your shirt off (this is indecent for us ladies, grab a towel instead!), cover the bird’s head. Darkness. Carefully get control of the birds feet and free her from the trap. Look her over. Is she definitely a passage bird? Yes. Do you love her? Yes. Congrats, you have a bird! Do you have a name for her already? Yes – Lady. My Lady was caught right over in Greenspring Valley (seems like it was meant to be…she might have even been hatched over on Irvine’s property!). She was one of the only passage Red-Tails we’ve seen this season. We almost caught what we thought was a passage Red Tail in Fredrick, but he just wouldn’t get stuck on the trap! We also trapped a passage Red Shouldered, who was a real cutie, but not the right bird for me. Trapping is so much fun even if you don’t catch anything! Driving around with your buddies looking for birds – $100 in gas money. Successfully trapping a bird – $50 in trapping supplies. Trapping the right bird – Priceless!
-
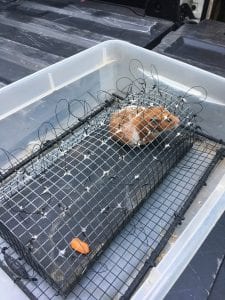
- Bal-chatri Trap
-
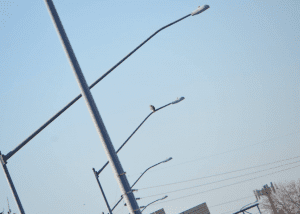
- Adult Red Tail on a Lightpost
-
- Passage? Red Tailed Hawk that just wouldn’t get stuck on the trap!
-
- Passage Red-Shouldered Hawk on trap
Sixth Step: Visiting the Vet. Check. One of the first things you want to do after trapping your bird is to take her to the vet for a check-up. (Please don’t forget to fill out all the paperwork from DNR within 10 days, but I won’t bore you with legalities). The vet will examine the overall condition of your bird, check for external parasites, check for internal parasites, and perform a few lab tests. Be ready to pay up…she’s your responsibility now. Test results will be in within a few days. More than likely, your WILD bird will have some sort of parasites going on. She was eating some gross stuff out there! Lady ended up having a light load of a parasite called Capillaria. A few days of meds was all she needed. She also got a quick dusting of fly powder to get rid of flat-flies that were living under her feathers. Be ready to return to the vet – you will return to the vet. In my case, I went back to the vet after three days! I noticed that Lady was holding her right wing funny…something some might not have noticed, but after working with many car-strike victims, I knew something wasn’t quite right! Another vet bill later – Lady has a bruised brachial plexus. A very common injury where a bird hits its “armpit” (for lack of a better word to describe the location) and it gets bruised. Like any bruise, the diagnosis was that she would be fine and the treatment is just the “tincture of time.” Lady is still being trained, but is on flying rest until the bruise heals! Accidents happen…your bird will get hurt at some point or another…apparently Lady is just trying to get all her injuries out of the way from the start!
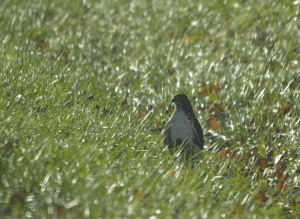
-
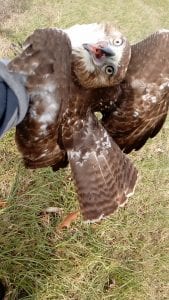
- Lady. Her reaction to being caught!
Seventh Step: Training. Half Check. Training your bird is where your bond begins and then grows and grows. Your bird will always retain her free and wild spirit, you are just taking the ingrained instinct of human fearfulness away as much as possible. She will learn from you and you will learn from her. The first step of training is to get her to sit on your glove without bating (flying away from you). Lady is a special bird, and was sitting on my glove calmly from day one. Other birds take a bit longer. Once they are comfortable with you, introduce them to other scary stimuli little by little in a safe and controlled setting. For me, that meant taking Lady to all of my family Thanksgiving dinners! She met all my aunts, uncles, cousins, friends, dogs, cats, birds, etc. Again, she wasn’t phased by any of this. By the end of the first day, Lady ate two mice from my gloved hand that I offered to her from a pair of tongs. By the second day, she was taking food gently from my hand. By a week, she made the leap of faith (literally) and hopped from her perch to my glove to get her food. Little by little she is making progress. I successfully got her to fly from a distance of about 4 feet to my glove for food before I noticed her wing drooping. She is now only allowed to eat from glove or gently hop to my glove until that heals up…then it’ll be back to flying to glove. Here is where my training has gotten to. The next part, once she is healed up, will be to keep increasing the distance she has to fly from her perch to my glove for food. I have implemented a whistle as another cue so that in the field, I should be able to whistle, hold my hand up, and have her come back to glove. Once she is flying from a good distance, I will put her on a creance. A creance is basically a really long, weighted dog leash. This way I still have control over her, but we can work on flying from longer distances. When she successfully and continuously flies from ~50 yards to my glove upon being called, it’s time to let her off the leash! The first free-flight will probably be the most terrifying thing in my life. I have to make the decision that I have trained her well, that I have kept track of her weight, and that I have bonded with her well enough that she will make the decision to return to my glove instead of soaring off into the horizon.
-
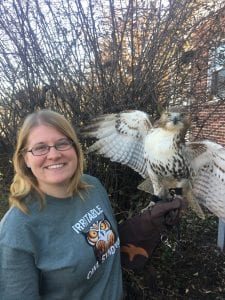
- First day on glove.
-
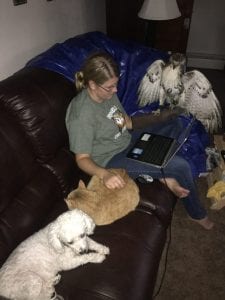
- Meeting some of my other animals!
Eighth Step: Hunting. Eventually it will come time where both you and the bird are ready – ready for her to really show you what she’s made of! Going hunting with a bird of prey is both similar, but drastically different from regular hunting. You still have to have all the permits and licenses (yep, you even have to buy a regular hunting license!) and you have a weapon…your’s is just a living weapon instead of metal and wood. The best part of hunting is that when you hunt with a bird, you don’t have to be quiet! You literally go out and “beat the bush”…your bird waits up in a tree and follows you around waiting for you to scare out prey. You yell, you slap trees with a stick, and then you yell some more! Eventually you will hopefully flush some quarry; a rabbit, squirrel, maybe a pheasant. Your bird will see it before you do! She’ll be on it as fast as she can. She might miss, or she might nail it. Now, she’s not a Labrador Retriever, she won’t bring the kill back to you, but she will ground it and hold onto it until you come and show her your glove and her reward. Of course you can’t get mad at her if she nibbles the head a little! With solid training and trust, the bird will learn how to take down larger quarry than she would normally do without a human hunting partner and she will know that she gets well-fed for her work! Even if she doesn’t get a kill that day, a good day is when your bird returns to your glove.
Ninth Step: Making a Decision. Falconry is full of decisions. The first big decision is whether falconry is for you. This decision can be made at any point during the above steps. Of course, it’s always best to make that decision going into it (so you don’t sink a lot of time, effort, and money into it), but it can be made once you find out that you don’t like the blood from the rabbit that your bird killed, or that you don’t have the time any more because of a new job, or a new addition to the family, or many other reasons. This is part of being an ethical falconer. Knowing that it might not be the thing for you, or that maybe you need to take a break. For those who make the decision that it IS for them, it will become such a fervent passion. I’ve only had my bird for three weeks and I can’t imagine a day without her. This is where the other big decision comes in…do you cut her loose and start with a new bird the next hunting season, or do you intermew (to moult a bird in captivity – keep her for a year or more…through each moult) her? As I said, many falconers will cut their bird loose. It’s gratifying to know that you helped a young bird survive and learn to become an avid hunter and that she will go on to produce offspring. Some though find they have a great falconry bird and will keep her for a few years and then set them loose. And others will keep their first bird for that bird’s lifetime. Each decision takes time to think through and there is no wrong answer.
Tenth Step: Follow Your Passion. No matter what decisions you make over the course of your falconry career, they are yours alone to make and they will help shape you in all aspects of your life. There is so much more to falconry than just hunting! Maybe hunting isn’t for you, no worries, there are other outlets that falconry can assist you in! For me I mainly did this for my love of animals. Taking a wild animal and forming a strong trust bond is something almost spiritual. The growth that I have made thus far as a human being and the growth that I know is yet to come makes me feel accomplished and proud of myself. I also decided to make this journey to grow as an environmental educator. Teaching others about these amazing creatures is why I was put on this Earth. It is my purpose – my passion. Conservation is another reason. Even though I will probably end up keeping Lady, my goal (once becoming a general/master falconer) is to catch, train, and release a juvenile hawk each year to help support the population of raptors in the wild. Other possible outlets for falconry include wildlife rehabilitation, captive raptor propagation, and abatement (using a bird of prey to rid areas of pests such as Gulls, Starlings, and Sparrows). No matter what route falconry takes you in, it is sure to be a wild ride!
“The reward that comes from practicing falconry is, and has to be, a feeling of your own personal satisfaction; that, and that alone. Chances are no one else will be around when your hawk is at her best. Falconry is a tedious, time consuming effort with long periods of stress and anxiety punctuated by heartbeats of gut-wrenching visceral satisfaction so intense that it is impossible to put into words.”
~The California Hawking Club Apprenticeship Manual
My Lady-Bird